Saturday, January 14, 2012

Whimsical Cakehouse Cupcake Course


I’m sure you have all seen the numerous cake courses that are now being offered on deals such as ‘Jump on It’ and ‘Spreets’. It is becoming a very popular way to promote a business and it certainly worked for Whimsical Cakehouse!   

A few months before Christmas I saw the deal Whimsical Cakehouse were promoting on Jump on It for a 2 hour cupcake decorating class worth only $49 which normally retailed for $160.  I literally jumped on it and asked my fiancĂ© Dave if I could have it as an early Christmas present. (Great ploy early Xmas presents - they feel guilty that you don’t have much to open on the day and get you more – score!)

I only managed to go last weekend and I was VERY impressed. Set up in Linda’s house in Dolans Bay the kitchen where she gives her classes has floor to ceiling windows with views of the water. It boasts a modern kitchen with all the coolest gadgets and tools. Linda previously worked with Planet Cake but found the travel to work too much so decided to open her own cake school no further than the downstairs of their own house – genius! It is purely about cake decorating and not baking. It is very hard nowadays to set up a commercial kitchen as Council set such strict regulations and fees that it’s just not worth it. So she orders her cakes from Mundo’s Kitchen in Alexandria and they can deliver straight to your door and I must say they were very yummy! 

When I arrived I was given a stool at a table with 5 others and in front of me were 6 perfectly cooked vanilla cupcakes. There was a bowl of white chocolate ganache and a box full of cake tools – I was in heaven!
First Linda showed us how to trim away a little of the top of the cakes to form a small dome and to allow enough room for the ganache. She advised that we could put a little ganache between layers of the cut off cake to make a ganache sandwich – I was already on to that one and even made a little cake pop!

We then hot knifed the cupcakes to give a smooth surface for the fondant. As the main focus of the class was to decorate Linda rolled out the fondant and cut circles for us and we were shown how to put these on the cupcakes to give a smooth finish.

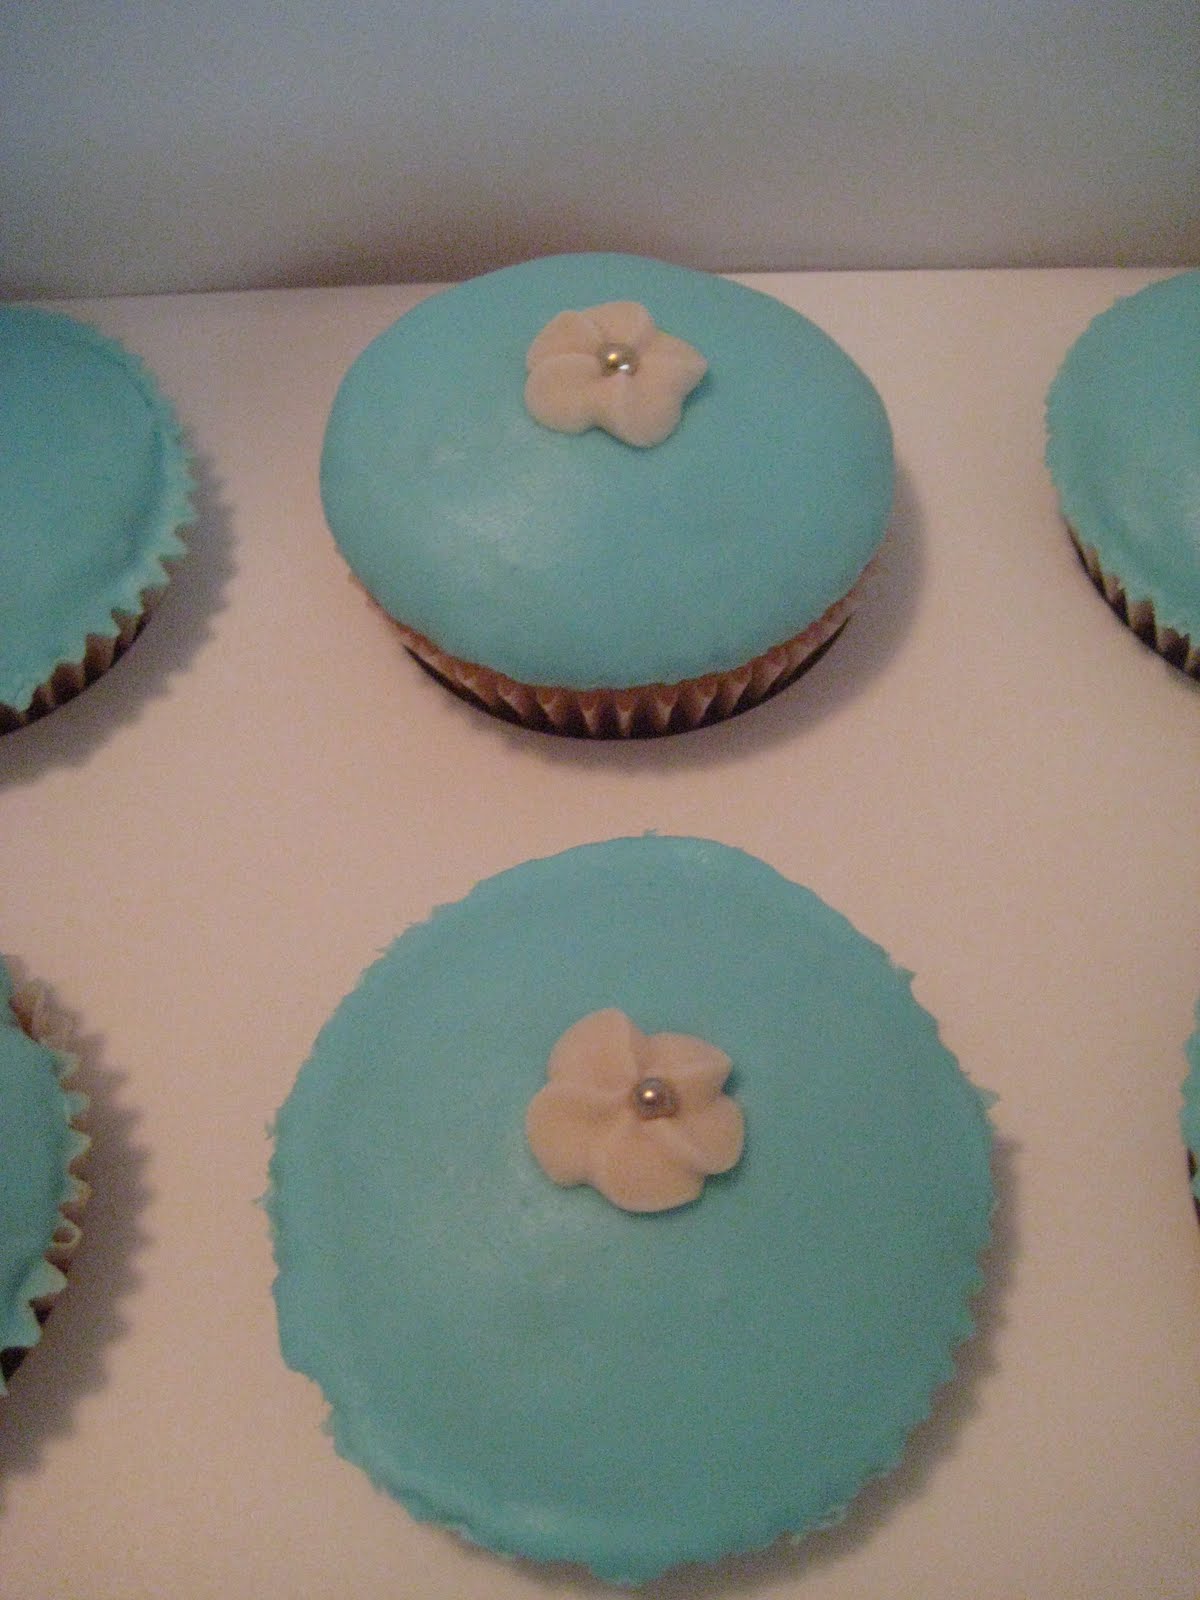
In the photo - top middle was my first cake and this was done by scoring lines with a knife and then using a tiny jagged pizza wheel to create the grooves. I then make slight holes with the end of a paint brush and placed a silver ball in there. Easy and it looked great! 

The cake top left was meant to be a star made out of the silver balls but a heart shaped would have been best – the balls did not seem to want to stay in the straight lines so the definition of the star was lost.

Bottom middle was 2 hearts cut out of fondant – the bottom was from purple fondant and the top white and we painted it with edible glitter! The two bow cupcakes were my favourite – I’ve made bows before so was confident with them but found the fondant a little dry from being left out for too long so they looked slightly cracked. But I was shown how to pipe with royal icing and I was very proud of my dots! They were so small that no squeezing was needed, just a slight pressure and release and they were done though it took a while before I realised I needed to place my elbow on the table to prevent the shakes!

The flower cupcake I love too. Linda showed us how to make the flowers from fondant. I am aware that I have a big cake tool shopping list and I hope to get some of these once the cost of our wedding has subsided! But all that is needed to make the flowers is a little flower cutter, a foam pad and a balling tool. You then let the flowers dry out over night or else handling them will damage or break them. And the dot is piped on with royal icing! Since Linda was short for time she had a mixture or store brought and homemade flowers. The white and pink flowers were store brought and you can taste the difference, they are a lot harder since they are made well in advance – you can still eat them after a year! The blue flowers Linda made and I piped the dot in the middle which I was proud of since they look just like the store brought flowers!

I learnt so much from the course and feel that my passion for cake decorating has been re-ignited! I am glad that I have a hobby that I am excited about to come back to after the wedding in April as I have heard that some brides get the post-wedding blues. However I am quite looking forward to learning new skills and trying the techniques used in this class at home and I hope that soon I can attempted the 2 tiered square cake course at Whimsical Cakehouse.

Although they look too pretty to eat they only lasted 2 days in my house and they tasted YUMMY!

Tuesday, December 20, 2011

Wedding Cupcake Disaster!


Finally. 2 months off uni for me to get back into baking and in that time I have to perfect how I am going to make my wedding cupcakes! The more prepared I am the less stressed I’ll be about making them a couple days before the big day in my mothers kitchen with an oven I’m not used to…

But my first trial did NOT go to plan.  The cakes looked so promising whilst in the oven, rising to a good height just above the paper case. But then they kept on rising and spilled over the edge.  After pulling them out to check if they were done they then collapsed in the middle.  So I was left with 18 pathetic, unpresentable white chocolate mud cupcakes.

Of course I didn’t waste these, I mashed them up with some raspberry jam and covered them in milk chocolate for an unhealthy treat.

But I still feel panicked about getting a good sponge – I love the white choc with lemon icing combination but they just don’t seem to be working for me! What if the same thing happens when I bake them in the oven in my mothers kitchen? I can’t give the wedding guests mashed up cake and jam!

The recipe I tried this time I obtained from a fellow cake baker on a forum – it was the Crabapple White chocolate mud cake recipe but she said that substituting half the plain flour with self-raising flour would produce a taller, lighter sponge. Well I shan’t be doing that again! The other flaw was that she forgot to mention how long the cupcakes should stay in the oven for. So I googled and found the recipe on one of my fave blogs Not Quite Nigella at http://m.notquitenigella.com/index.php/2008/10/28/eyeball-cupcakes/

Here the recipe stated 30mins in the oven, had no self-raising flour, AND 1 cup less sugar which is a lot! So I will have to try that variation next time….

Meanwhile it was not a complete wedding cupcake planning disaster.  I got out my new piping bag and nozzle and had a couple attempts at piping a swirl. The picture attached to this post was my 3rd attempt and took no more than 3 seconds! So I will be ditching the handmade swirls with a pallet knife and going for this soft serve look instead. Much more time efficient!

CC

Thursday, June 23, 2011

My very 1st 2 tiered cake!


I have not blogged in a while as I had my mother and father staying with me for the month of April, I was made redundant at work and then had 10 uni assignments due last month!

What I did do cake wise since my last blog was my very first 2 tiered cake for my engagement party! I was so proud of it – it took 10 hours and I did bite my mother’s head off a bit and it isn’t perfect but the I was so chuffed that I managed it without paying $100s on a cake course!

The imperfections that I could see were that the fondant was a little wrinkly if you looked up close. That was because I worked it too hard. It took me 5 goes to get the circumference of the fondant large enough to cover the bottom tier, meanwhile drying out each time. The ribbons are also a little cracked as I wasn’t working at a professional speed. The bottom tier must have been a little wonky as there is a slight gap between the tiers but I tried to hide it with some ribbon. Also the rip isn’t quite as good as in the Planet Cake book but better then my last 2 attempts!

The bottom tier is carrot cake with white chocolate ganache – the cake was perfect and moist – no shrinkage at all making it very hard to ganache! The top is chocolate mud with dark chocolate ganache. Both tiers were a great hit at the party. As my fiancĂ© and I were cutting it I remember saying we should keep the top tier to eat later as that would be too much cake but it all went – in minutes! 10 hours of work in about 10 mins!

But it was worth it.

I am looking forward to the time in my life when I have no uni or a full time job and can practice lots and let our kids and school friends be the tasters!

After this I didn’t make a cake for 2 months due to the stressful time of the redundancy and uni, but then I had a baby shower with the theme ‘Cupcakes & Champagne’ and I thought I MUST make some cakes!

I tested the waters again with the white chocolate mud cupcakes with lemon butter cream which I hope to use for my wedding favours (more on this woe later...) and I tried 2 new ones – raspberry cake with white chocolate butter cream and a chocolate sponge. I had planned to make a chocolate icing for these but it was 10.30pm at night and there was plenty of white BC left so on that went!

So that night after work I made and iced 34 cupcakes – the icing wasn’t my best as I gave up trying that late at night so I took no photos. However, they were all a hit and now all I have to do is work out what will be best for the wedding!

Oh AND.... I did all this in my swanky new pale pink Kitchen Aid which I was very lucky enough to have been given on my 27th birthday thanks to my very thoughtful fiancé and lovely family!!!

Friday, March 4, 2011

Tim Tam Baby Booties

Just wanted to share this blog with you:

http://www.mycakeschool.com/member/videos/wordpress/

I've made Tim Tam pops before as seen in my earlier posts but these look adorable! And I bet they are delicious!

I will HAVE to try them sometime - maybe one of my friends needs to have another baby so i can try this design!:-)

Baby Girl Chocolate Mudcakes


There are so many different chocolate cake recipes out there it can become so mind boggling. Mud cakes are good as they last longer but some find them to rich and dense. If you go for a lighter sponge then there is a higher chance that they will dry out so not suitable for large orders such as weddings that need to be decorated ahead of time.

I have found this recipe to be a winner - it isn't as dense as a mud cake but still tastes amazing after 5 days. they freeze well too. My only concern is that they don't rise very much. I fill 3/4 full and they reach the top of the paper case and then stay flat. I think the reason they don't go dry is that there isn't much air in there and that is what helps the rising process. I am to experiment with substituting some self-raising flour and see what effect that has on the rising and shelf life of the cake.


Chocolate Cupcakes
Makes 32 small cupcakes or 24 large
- 1/2 cup cocoa, sifted
- 2/3 cup chopped unsweetened chocolate (about 4 oz/125 g)
- 1 cup boiling water
- 1 cup butter
- 1 cup granulated sugar
- 1 cup brown sugar
- 3 eggs
- 1 tbsp vanilla
- 2 1/2 cups all-purpose flour
- 2 tsp baking powder
- 1 tsp baking soda
- 1 cup milk

1. Combine the cocoa and unsweetened chocolate in a bowl. Pour boiling water over chocolate and let sit for 2 minutes. Whisk until smooth. Cool.

2. In a large bowl or bowl of electric mixer, cream butter with both sugars until very light. Add eggs one at a time. Beat in vanilla and cooled chocolate mixture.

3. In a separate bowl, combine flour, baking powder and baking soda. Add flour to butter mixture alternately with milk in three or four additions, beginning and ending with flour.

4. Fill 24 well-buttered or paper-lined muffin cups. (Fill muffin cups three quarters full; cupcakes will not rise as much as muffins.) Bake in a preheated 350ÂşF (180ÂşC) oven for 20 to 25 minutes, or until a cake tester comes out clean. Cool on a rack before icing.

My mother suggested I try this recipe. It reminds me of a gluten free cake - lots of eggs and butter.

Chocolate cupcakes
Makes 18
300g butter
300g plain choc (70% cocoa solids)
5 eggs
125g caster sugar
110g self raising flour

- Heat oven to 160C
- Melt choc & butter.
- Whisk eggs and sugar in large bowl until pale and thick (quadruples in volume and took about 10 mins).
- Fold in sifted flour gently.
- Stir in melted choc until well blended.
- Spoon mixture into cases and bake for 15 mins until toothpick in centre comes out clean.
- May well still look gooey
- Remove from oven and cool.
- Decorate as you wish.

These cake rose beautifully - must have been all the air in that whisking! I must have left them in too long which was a shame as they were a little dry. I will try these again and check more frequently. These wouldn't be so good for a longer shelf lift due to all the air but a great chocolate cake for decorating.

I made these Baby Girl cupcakes for a friend who recently gave birth to a baby girl called Hannah. Her older sister loves pink so I thought they would enjoy eating these.

I love the sprinkles - they are from a Barbie mix from Sainsbury's in the UK and my mother is bringing lots over for me!

Monday, February 28, 2011

Frangelico Cupcakes


Last weekend I made some Frangelico cupcakes for my fiancé's sisters birthday lunch (for those of you that don't know Frangelico is a hazelnut liquor - great with coke or on it's own!) I was inspired by Natalia's recipe: http://www.how2cakes.com/frangelico.html and I will HAVE to try her Jaffa cupcakes one day soon!

This recipe was so quick and easy and I found the texture of the batter to be quite different from other chocolate cakes. It had a mouse like consistency and I was eager to see how they tasted.

As there were 5 of us for lunch I made one for each of us in a large purple baking cup and with the remaining batter filled pink paper cases.

In the oven they rose beautifully and I iced with Nigella's nutella buttercream frosting:

Nutella Buttercream
125g butter, room temp
75g dark chocolate, melted
2 tbsp Nutella
2 cups sifted icing sugar
Cold milk

- Cream the butter until fluffy, slowly add the melted chocolate (in a thin stream to make sure the butter doesn’t melt).
- Add the Nutella
- Slowly beat in the icing sugar, ½ cup at a time until the buttercream is fluffy and not too thick – if it thickens too much add 1 tablespoon of cold milk at a time and beat.

(Instead of milk I added Frangelico!)

I had some mini chocolate 'cigarettes' which I cut in half and stuck in the cake for decoration to resemble a chocolate sundae!

On tasting these cupcakes I think those cooked in the baking cups were a little dry - perhaps because the moisture was not trapped during cooking by a patty tin but was free to escape. But the icing was so delicious one hardly noticed the dry sponge if you got a load of icing in the bite!:-)

When I make these again I will check more frequently as I may have slightly overcooked them. And I will add an extra tbsp of Frangelico to the batter mixture to give an extra kick!:-)

Tip - add the cigarette's at the last minute as if stored in an airtight container they go soggy!

Enjoy!

Saturday, February 19, 2011

The headache of cake decorating


Ganaching is a pain in the arse. I still haven't got the hang of it. I've discovered a new technique where one places a board, the same size as the supporting cake board, on top of the ganache and then the sides are slowly filled with ganache. The theory is that the cake shrinks in cooking by about 0.5-1cm, therefore, giving you plenty of room for adding ganache to give it structural support, even sides and sharp edges.

However, when ganaching my 6" cake last weekend, I noticed that it was only a fraction smaller then my 6" board. How was I meant to get my ganache in there?!

Actually in this case I was using buttercream. I was experimenting with Belgian White Chocolate paste - similar to fondant but made mainly of chocolate which tastes delicious, but chocolate paste and chocolate ganache is definitely a chocolate overload!

I used Toby Garret's decorators buttercream recipe which is 250g butter, 250g copha, 750g icing sugar sifted, 1.5tbsp pavlova magic, 1/4 water. The copha means it is very stable in the heat and the pavlova magic lends a stiffness which is good for setting on the cake.

I've now learnt from asking on the Planet Cake forum that it is advisable to trim away the cake to get that 0.5cm gap between the cake and the board and I will do this for next time (compensating with an extra layer of cake and more height). But this time, as it was just for FH and I to enjoy, I whacked it on another board and went ahead with the icing.

I tried and tried to get the straight edges without using a board (as the 6" was too small) and in doing so developed a rather thick layer of buttercream icing. I also found it went inwards towards the top of the cake. But here is a picture of the iced cake before the chocolate paste - I am proud of this as it's the best I've done so far. Maybe a hot knife would have been good? But I have only done this with ganache and didn't want to ruin the buttercream.

The chocolate paste was very difficult to handle, most likely due to the heat, so I haven't attached a picture as it looked very dimpled but the combination of chocolate mud cake, butter cream and white chocolate paste was sensational!

Next time - more cake then icing! It's a cake with icing, not icing with a bit of cake!:-) But each attempt I'm getting better and better - so I will just have to keep practicing!

Cake anyone?

Saturday, February 12, 2011

Liquid Fondant Baby Blue Cupcakes


My friend gave birth to a beautiful baby boy last Sunday so i was inspired to make some baby blue cupcakes for the happy family.

The Dad is well known for liking fondant. However, i wanted to try something different. I discovered a technique in the Peggy Porchen book where fondant is melted to a liquid consistency and the cupcakes dipped in to decorate. This really appealed to me as eliminated the rolling, cutting and ganaching aspects of the Planet Cake method.

So, I brought a box of Orchard fondant and put 250g in a bowl in the microwave for 10 second intervals. I added a little water and stirred in-between bursts in the microwave. After some vigorous stirring the lumps disappear and you're left with some smooth liquid fondant.

I then added a little Wilton sky blue colour gel.

I had made the Planet Cake vanilla cupcakes and covered in sugar syrup to keep them moist and to prevent crumbs from falling off into the fondant.

I then dipped each cupcake one by one in the bowl of fondant. By the time i reached the last cupcake the first had dried and so i dipped for a second time. I then placed a sugar rose in the center of each cupcake.

Those cupcakes that didn't have too tall a dome shape did get fondant on the paper case. However i used the Coles paper & foil cases so, once the fondant had dried i removed the foil case to give a better presentation.

I had wanted to pipe dots of royal icing around the flower but i had never made it before and my piping is terrible so my FH pointed out that less is more and that they looked beautiful as they were.

I was very pleased with the end result and i'm sure the tired mum and dad will be too!:-)

Saturday, February 5, 2011

The perfect mudcake

Ok, i've had enough! I just want to be over the testing and practicing and move on to the pile of exciting and delicious recipes that i have yet to try!

My engagement party is in april and i'm making a 2 tiered exploding hearts cake, top tier 6" choc mud and bottom 8" carrot with white chocolate ganache.

Planet Cake have a delicious choc mud recipe but it is renowned for sinking. After receiving many tips from the amazing cake decorators on the PC tea party forum - i used baking strips to keep the sides from rising to fast (resulting in the middle sinking) and covered the top of the cake to keep it moist, left it in the over for OVER 2.5hours(!?) and let it cool over night before turning out of tin.

This is a small cake and i'm amazed at how long it took to bake. Despite testing it with a skewer, i believed it was ready. However, when i came to trim off the crusty top it was incredibly gooey - yummy but too gooey to carve. Freezing it first may help but i think the 3 hours of baking will now just be used in cake pops.

So... i have to try again!

Although the PC is my favorite to taste, i have a 6" exclusively foods choc mud in the freezer so i will test that this weekend.

Once this is over i'm going to go cake crazy and make something new every weekend!

1st being using that sponge to make peanut but pops or truffles - crumble the sponge and mix with smooth peanut butter, roll into balls, stick on lollipop sticks and dip into melted milk chocolate! Mouth is watering! Will then wrap in cello wrap and give to friends or omit the lollipop stick and use as truffles and give as gifts.

I know a few people who would like fudge chocolate cake peanut butter balls!:-)

Sunday, January 23, 2011

My 3rd fondant cake


This is my 3rd attempt at a fondant cake and a practice for my engagement party cake which will be a 2 tier choc mud and carrot cake.

I was very happy with the result though things did go wrong. The ganache wasn't as smooth as it should be meaning the fondant didn't have a smooth surface so no sharp edges.

When i rolled out the main colour i didn't have enough fondant and had to start again and it was a real effort to reach the circumference of 38cm with my wooden rolling pin!

But the errors i made on my previous cakes i corrected this time round. The explosion rip in the middle should have pink segments on the inside but my fondant didn't stick too well. However, thanks to the planet cake forum i have a great tip to try next time - baking paper and more sugar syrup!

I'm still nervous to do the 2 tier and still need to practice the mud recipe to it doesn't sink in the middle. Next time i'll be using home-made baking stips!

But i will have to be organised as my parents will be visiting and i do not want to spend hours in the kitchen sweating away when they are here. i'll just have to do it when they are asleep! This cake afterall did take me 9hours.....

But practice makes perfect! Dave and i now have a whole 8inch chocolate mud cake with chocolate ganache to eat....

Sunday, January 16, 2011

Little bow cupcakes


This was my second attempt at fondant this xmas - my first attempted with cupcake decorating!
I had difficulty getting the icing to fit the cake right and my bows were TERRIBLE to begin with, that's why the photograph as a pink bow as i ran out of white icing. But overall they looked quite cute in the end and were yummy to eat!
This weekend i made decorators buttercream which still tastes good but the fact that it has shortening in puts me off. Next weekend is practice for my engagement cake so an exploding hearts cake. I just hope there is no humidity!!!!!

Learning in humidity is not the best way!


Over the xmas break i had 2 attempts at Planet Cakes cakes - here is a picture of the gift box cake - i thought i knew what i was doing and was very disheartened. But was slightly reassured when other cake makers said that humidity was a killer for cake decorating. My ganache was so soft and oozed out the bottom and my bow was floppy! Still - can only improve!

Thursday, December 16, 2010

The perfect cake...

So I have about 100 different, inspiring cake recipes I'd like to try and different skills I'd like to practice but I will not let myself try these until I am happy and settled with my wedding favour cupcakes.
My goal is to find the perfect cake that is moist and will stay delicious after 3-4 days as, being a wedding, there will be tons of other stuff that I'd need to do and making and decorating 80 cupcakes will just be extra stress! So I either make them 4-5 days before and then ice 1-2 days before, or, make the cupcakes in advance and freeze. I also need them to be about 2.5 inches tall, including the icing, so that they look right in the cupcake box.
I have found a great chocolate sponge recipe that tastes great 5 days out the oven, and also comes out the freezer unaffected. Problem is that it has no dome to it - therefore not much height.
So I'm on the mission to find the perfect sponge - white mud, chocolate, vanilla - anything, that'll taste great and have a good dome for icing.
Firstly I'm trying the Planet Cake white chocolate mud, then the Exclusively food white chocolate mud, then this inspiring idea or making holes in a vanilla sponge and pouring lemon juice and icing sugar in there. I'm also going to experiment with my favourite chocolate sponge recipe and see if by using more self raising flour, I can achieve a better dome.
The next problems to solve are: Getting a delicious butter cream that withstands the heat and is safe to eat after 2 days and to find the right tins and paper cases to make large cupcakes.
All this testing will result in lots of cake that needs to be eaten so I will be looking for volunteers, otherwise I won't fit into my wedding dress!

Saturday, November 20, 2010

Tim Tam Pops


I have found the new crazy of Cake pops and am hoping for a book on Cake pops for xmas! meanwhile i found this recipe for Oreo pops and adapted it to tim tams! Absolutely incredible! I still need lollipop sticks and when i have cake and ganache left over i will make the standard cake pops but these were quick and delicious! The faces are for fun and practice at a steady hand!

Firstly i crushed the tim tams and mixed with cream chease. when they are hardened i stick a skewer dipped in white chocolate. then i dip the pop in melted chocolate till completely covered.

They taste amazing and i wish i'd made more!

Saturday, October 23, 2010

40 Pink Cupcakes!


It has been a busy baking week! Today I made and iced 40 cupcakes! Dave was doing handy man jobs and I was without light at then end so iced in a head torch - would have look ridiculous! So these are for a friends daughter's first birthday party.

The theme is pink which is handy as it's also Pink Ribbon day on Monday so the duff ones are being taken to work to be sold! The extra duff ones have gone in a container for Dave and I to eat (along with the bounty mudcake - oh god...)

I am still not satisfied with my standard vanilla and chocolate cupcake recipe. I have researched loads and the chocolate one I tried today tastes nice but not perfect and until I do find one that I am happy with I will not go on to try the 100s of different, exciting and delicious looking recipes I have piled up to try. I also tried 40 swirls and some turned out just how I wanted but the rest were terrible and seeing as I can't pipe then - I’m just going to have to keep on trying!!!!!!

Thanks mum for the cupcake sprinkles - I love them! All the way from England in a box on a ship!:-)

Bounty Mudcake caught fire!


I made a bounty mudcake the other day. It was the Woman's Weekly Cherry mudcake but adapted to bounty bars as my fiance is not a fan of cherry ripe.

It requires a tall tin lined with baking paper. i went a little over the top as normal when lining cake tins but, when put on the middle shelf they were rather close to the top of the oven.

I ignored this and was faffing around with another problem. with my large cake tin, if the mixture is slightly runny it tends to leak alittle. so i was cleaning up the drips and arranging tinfoil to prevent them from falling to the oven floor. last time i let the batter drip out it burnt in the oven and filled it with smoke.

Then i noticed that the baking paper had caught fire!!! I yelled for Dave and we took it out - the cake had a ring of fire above it! I refused to put the cake in the sink 'we can save the batter!!!' and eventually the fire died out.

The baking paper had burnt all the way down to the batter and had flake off but - i picked out each and every tiny speck, albeit with a little batter too but most was left unharmed.

so in it went again and came out perfectly. i iced in ganache and you would never tell that it had nearly been to waste. if we do come accross a bit of charred baking paper, we might only assume it is coconut.

a delicious cake - next - i shall try with Mars Bars!!!!!

Saturday, October 9, 2010

My first attempted at fondant.....


Terrible! My first attempt at using fondant icing! I was planning on doing my wedding cake but after this attempt i think i'll have to re-consider....

I made the Planet Cake carrot cake - turned out perfectly. Then i made a white chocolate gananche and layered the cake with this and covered the entire cake so it was smooth.

I used Orchard's white fondant icing. I coloured it pale pink, the Cavey Cakes colour and started to knead it. Turned out pretty good! I had to have a couple attempts at rolling it out due to it sticking and ripping, and maybe I should have measured it as, it didn't quite cover the cake.

But once it was on i did a patch up job and it didn't look too bad. If i'd had a smoother i could have made the finishing a bit smoother so my finger prints weren't obvious! I experimented with writing pens my mother sent over from the UK and did a really lame flower.

But it is still delicious to eat and Dave and I will be eating cake every night this week. I'll just put it down to good practice...

Sunday, September 26, 2010

Classic Victoria Sponge


As been a while since I have made a cake due to getting engaged and all the drinking and partying that follows!:-) I had the house to myself on sat and so I was planning on making cupcakes to practice my piping. I even bought the good quality colour paste for the cake suppliers.

But we had an impromptu BBQ for a friends bday and I offered to make a cake. Classic Victoria sponge with jam and cream is her favourite so I attempted to make a light and fluffy sponge.

Came out quite well I thought so this morning I covered both inside halves of the cakes with strawberry jam and whipped cream. Too much whipped cream though as it went everywhere when cutting it! It was the 1st really hot weekend since winter and although keeping the cake in the shade the cream did not like the heat and looked a little weird. Still yummy though! I had 2 large slices!!!!

Next weekend I’ll do the cupcakes....

Saturday, August 14, 2010

Giant Cupcake fits and arrives safely!


Well i have been wondering for the last 2 weeks how i would get this Giant Cupcake in a box and safely to work and i managed it!

I made a lid, cut a hole in the cake box, made the cake, put it in the box, attached the lid and carried it on the train to work - phew!

It's a chocolate mud cake with a hidden chocolate truffle and smartie filling with milk choc ganache as the paper case and buttercream icing with smarties.

Unfortunately Smarties no long add E numbers to their chocolate!:-) so the colour of the smarties were very dull - i omitted the puke coloured ones and ate them myself...

I think someone needs to make attachable box lids to accommodate giant cupcakes!:-)

Saturday, August 7, 2010

DIY cake box for Giant Cupcake


This week i have my first Cavey Cakes order and it is for a giant cupcake. However, stores don't seem to sell cake boxes large enough! it's either you usual 20cm which are only 8cm high or a tiered wedding cake box which retail for about $20! i'm only charging $50 for the cake....

so i have brought the normal sized cake box and i'm going to attempted to make an extension! i am cutting a hole in the lid, about 1.5cm from the edges, and i am making a box out of white cardboard. I shall leave lips on the diy box and glue/sellotape these to the cake box, thereby hopefully allowing an extra 10cm in height - that should just about do it!

Then, the mission is getting the box safely into work and delivered!

This however isn't until Tuesday - so to keep me busy i will be making Dave a batch of banana cupcakes with lime and coconut frosting for him to take to work. Can't be eating them all to ourselves again!